Showing posts with label nail art. Show all posts

Monday, 23 October 2017

BUFF NAILS, EDINBURGH

I used to think I was doomed forever to have short nails. I was a tomboy growing up, and then spent a huge amount of my teenage years on a farm, so they were always short and scruffy. Even when I got into nail art, they were still short and a bit terrible, although I tried my best with what I had. It clearly didn't work though - sorting out blog comments recently I saw one on an old nail art tutorial that just said - 'this is terrible! why would you share this?'. Er, indeed.

I was clearly in need of a bit of a miracle, so enter Edinburgh indie salon Buff nails, who have come to my rescue and made my dreams of taloned nails come true!

Waverley Arches Edinburgh

Buff Nails Edinburgh
Photo by @buffcsvanda on insta
Buff is based in The Arches at New Waverley, a super cool street of renovated Victorian arches, that also houses a donuterie, a juice bar, coffee shops, cool bars, a make up studio and other hipster delights. Buff is a design-led nail workshop, that aims to offer an innovative manicure experience. The space is lovely, it's quite industrial and quirky, and fits their super-cool but super-nice Scandi vibe perfectly.

I first started going a year ago, when I was in need of some serious treat yo' self times and haven't looked back. I'd never had shellac on my nails before and was weirdly well nervous about it (imagining that it would all flake off, or they'd get really damaged, or it would be a nightmare to remove), but no. It turns out that shellac is exactly what I've been missing my whole life, and my nails are stronger and longer than ever. I reckon it's partly down to the fact that it lasts for ages - I get three weeks of chip-free shiny polish now, whereas before I was painting my nails all the time, which must have dried them out pretty badly.

Buff nails Edinburgh review

Buff have a good rep for custom nail art designs, so on top of getting a manicure (which costs £30) you can add on custom art for only £5 extra! I have fully taken advantage of this and they are so nice and willing to accommodate your requests (even when they are obviously going to take an age).

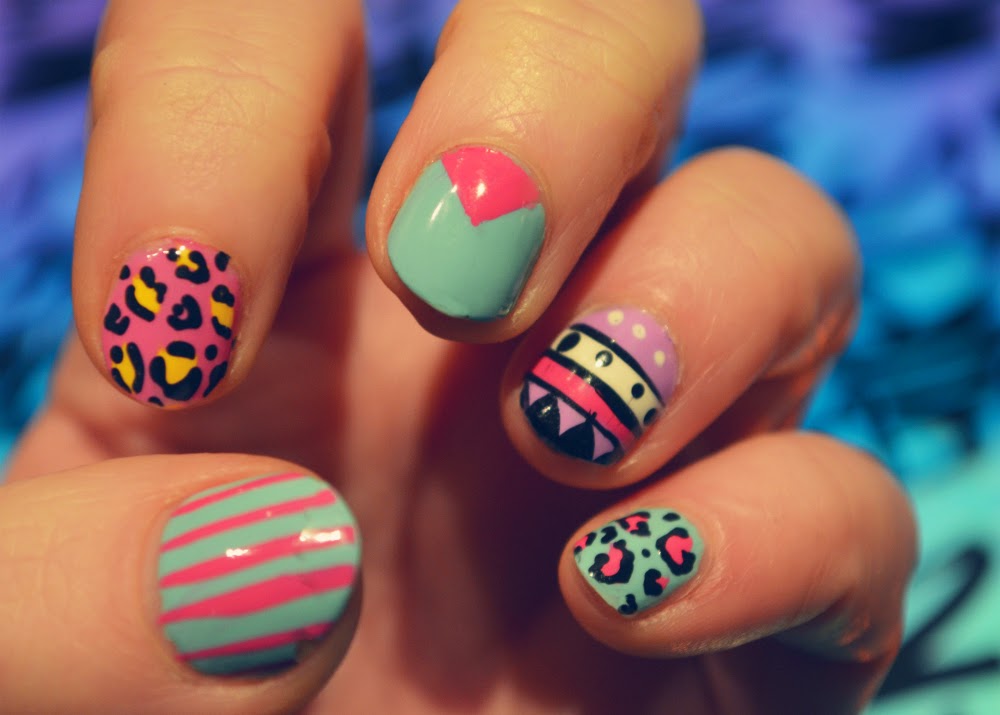
It's hard to choose, but I think my favourite nails were my pastel ombre rainbow nails (thanks to the very patient @buffcshelen!), followed by the custom edfilmfest nails they painted for the festival's programme launch. Over the last year I've had holographic nails, chrome nails, polka dots, pastel fades, geometric shapes, you name it - the hardest part is choosing what to get, knowing how long it will last!

I'm totally hooked. I feel so much more put together with a glossy manicure, it's the only beauty treatment I get regularly and I love it.

You can check out more of Buff's work on twitter, insta and facebook, and (hooray) book appointments online.

Wednesday, 14 January 2015

WAH LONDON NAIL ART KIT

I've been so good in the January sales this year (partly because I hate the shops during the sales, and mainly because I'm skint), but I could not resist the WAH LONDON Ultimate Nail Art Kit from Boots, which currently is on sale for £25 (down from £80). Whaaaaaaaat.


I've been a big fan of WAH Nails for ages. A few years ago, when I was down in London for work, I popped into their Topshop salon for an impromptu visit, which started my love for nail art. Recently they launched a range of polishes and tools, inspired by fashion, street style, art and technology for all of your nail art needs.

I've been really lazy with nail art recently, so it was so much fun to have new nail art pens to play with!


The set contains loads of stuff, and comes in a super shiny, but really nice case.

There's tutorial cards to show you a few different nail art looks (including leopard print), a nail file, buffer, scissors, clean up brush, cuticle pusher, jewel tool, two pots of jewels (gold studs and little sparkly ones), instructions on how to use all of the tools, and four nail art pens (usually £7 each) and eight nail polishes (usually £9 each). Phew!


The polishes include: Biter's Beware, an acid yellowy green shade; Love My Team, a classic red; Mating Surfaces, a vivid lilac colour; Wifey4Lifey, a jelly pink; An Even Bigger Splash, a bluey green; No Nails No Life, a cool pink; I'm Real, a pinky brown nude; and Classy Glassy Glossy Topcoat, a super quick-drying glossy topcoat.

I used Mating Surfaces, Wifey4Lifey and An Even Bigger Splash, and I'm really pleased with how nicely the colours work together.


The nail art pens come in black, white, hot pink and yellow, and are ace - each pen has a double function, so you can either pull the cap off and use the pen nib (perfect for little details), or unscrew the lid to use the thin striper brush (which lets you paint graphic lines).

It's such a good kit, and I can't believe that there's still some left in the sale! If you're interested in nail art, I would hugely recommend this - it's such a bargain!

Monday, 17 February 2014

Outfit: I heart science

Work has been a bit mental lately, as we've been getting ready to launch the 2014 Edinburgh International Science Festival programme - which means lots of busy, busy days, endless proofing, and one very tired graphic designer boyfriend.

But now it's out! The programme is themed around the idea that science is at the heart of everything (which, obv, it is), which meant that the festival had a great excuse to get all loved up at our Valentine's launch...

Dress -  Surfdome*
Shoes - Dr Martens
... with science puns! Look at our amazing giant (anatomical) love hearts! With maths jokes! The best.


I had been swithering over what to wear to the launch (which needed to be smart enough to say hiya to clients, but not boring), when www.surfdome.com came to the rescue (thanks guys!). They asked if I wanted to blog about something from their site, and I was over the moon when I spotted this dress by Louche, because I tried it on AGES ago in Joy, fell a bit in love with it, couldn't think what I'd wear it to, didn't buy it, have had dress regret ever since. Not any more! 

It came really quickly, which was handy as I only had a few days before the launch, and it is an absolute dream. The material's actually pretty thick - this ain't a dress for the summer, and it feels really good quality. It's got a lovely dipped zippy back (which I forgot to get a photo of, but you can see it here), and the most perfect cropped sleeves.


To go with it, I also painted my nails in an attempt to match our beautiful programme cover - with an anatomical heart, and a pi loveheart (I had a 'cutie' heart on my other thumb too). I'm not convinced you can actually tell what it's meant to be, but I was pretty happy with my freehand attempt. 

The Science Festival is going to be super fun this year, so stick April 5th - 20th in your diaries. We've got slime! Food! Blood! Cocktails! Maths comedy with my pal Simon! Robots! Free beer! Serious stuff too! You can have a look at the programme here if you fancy. Yaaaay science.

Monday, 21 October 2013

Halloween how to: spooky nail art

This week's halloween tutorial is useful if you want to make a wee nod towards Halloween, without actually dressing up or putting too much effort in!

I've put together five nail art designs that are fairly quick and easy to do, and don't need much more than some nail polish, a kirby grip and/or a thin paintbrush (I use an old liquid eyeliner brush, which is perfect for nail art!).

Here's how you do it...

Eyeball

1. Paint on a large dot of blue.
2. On top of this, add a dot of black polish.
3. Using either a kirby or a small brush, paint on lines of red to make a bloodshot eye.
4. Use the kirby again, and dot on a tiny bit of white on the pupil.

Haunted House

1. Paint a base coat. I used Rimmel 'Too Cool to Tango' which has fast become one of my favourite polishes!
2. Dot on a large circle of white polish to make the moon.
3. Paint the basic shape of a house. You can use a small brush to make the edges neater if you like, but I just used the normal polish brush.
4. Use a kirby grip and some yellow polish to paint on light shining through a door and window.

Spider

1. Paint a bright coloured base coat. I used Rimmel 'Ultra Violet' which is a lovely colour (and much nicer than it's photographed here!).
2. Dot on a large black blob to make the body.
3. Use a kirby to paint on eight legs.

Ghost

1.
Paint a white base coat. This is O.P.I. 'My Boyfriend Scales Walls' which has a slightly greyish tint (sorry again for the terrible light).
2. Dot on two black eyes.
3. Splodge on one large dot and use your brush to drag it down into a tear-shape to make the mouth.

Bats

1. Paint a base coat. This is Model's Own 'Beth's Blue'.
2. Dot on a large white dot, to make the moon.
3. Start making the shape of the bats, by splodging on bat-shapes. I used a kirby to paint a large dot in the middle, and two smaller dots on either side to make the wings.
4. Use a small brush to shape the bats (aim to make them look more like actual bats, and less like terrible splodges). I neated up the wings and bodies, and painted little bat ears. This was quite faffy - maybe only try this one if you have a steady hand!

I hope that was useful... if you are looking for any more nail art ideas, I have another ten halloween designs here, so you should be spoiled for choice!

Wednesday, 29 May 2013

Outfit: denim & floral shirtdress

Say hello to my new favourite dress! The lovely folk at Debenhams invited me to review one of their dresses, so I decided to step a wee bit out of my comfort zone.


I picked this super sweet denim & floral H! by Henry Holland shirtdress. I normally shy away from things that button all the way up, because as cute as collars (and collar clips, swoon!) can be, I look a bit ridiculous with high-neck outfits. Instead I wore a black vest top under the dress, making it a wee bit more casual, but still cute!


The dress has a lovely floral panel on the shoulders, so I wore my hair up to properly show it off. You can't really see my nails, but they are dark grey with silver scalloping along the tips - they're kind of pretty but grungy, and aren't quite as harsh as jet black nails. 


It buttons all the way down & the skirt is really light and floaty, which is perfect for summery days. Sadly, because I live in Scotland (which is experiencing a NEVER-ENDING WINTER), I haven't had the chance to wear this in nice weather yet, but I can report that it looks good with black tights & stompy boots too.


I've also been wearing my elephant necklace (last seen here) almost non-stop, I love it! Hooray for pretty dresses.

Friday, 10 May 2013

Star Trek nail art

It's been a while since I've posted nail art, I've been bad! I've been wearing slightly more sensible designs on my fingertips since changing jobs (you really have to work out the lay of the land before turning up with panda nails) but in celebration of Star Trek coming out this week, here's some sci-fi nails!

Models Own - Feeling blue | Black magic | Red alert | Lemon meringue | Barry M - Black glitter (np333)

It's probably worth pointing out that this is NOT my hand - it is the much more manly hand of my pal Joshua, who has become my partner in nail polish crime (he had kawaii animals painted on his nails last month, which you can see in April's instagram post).

I grew up watching Star Trek with my dad, who would definitely not call himself a Trekkie, but did sneak into a Star Trek convention in Las Vegas with me (a fun day, sorry security guards!). I love it because I've watched it my whole life, but I'm also a HUGE fan of the new movies... I like that Star Trek is so cool these days!

Anyway, this design is pretty simple. There's a whole world of potential designs out there, but we stuck with the colours of the crew uniforms, a spacey-warp-speed thumb (it glitters) and, obviously, the Starfleet logo. I mainly used Models Own polishes as they are always so lovely and reliable, I highly recommend them! For the finer detail I used an old liquid eyeliner brush dipped in polish - much cheaper than a nail art pen and it won't run out or clog up!

Live long and paint nails...

Friday, 28 December 2012

Nail polish collection

I'm not usually one for showing off Christmas presents, but I couldn't resist blogging about this - Craig got me an ace (and very, very useful) nail polish holder!

Nail varnish display from ebay
It fits my collection pretty perfectly (and gave me a much-needed push to clear out loads of the old clogged up polishes I had been hoarding for far too long). It's so nice to see all of them in one space, and know what colours I have without having to root around in a massive box for ages! 

There's also space underneath to fit another display in (which I think I'll have to do fairly soon, I'm pretty addicted to buying polishes!).


I'm a pretty huge fan of Models Own - they make such a lovely range of colours and they always go on really smoothly, which is important! I've got a few by Barry M - I don't think they are as consistent in terms of quality, but they are really affordable and I love their glitter polishes. I also love 17 - they always seem to be on special offer, or be part of free gift sets which is nice! 

I couldn't resist sorting them by colour either, which means it (sort of) matches my library too! 

Monday, 26 November 2012

The Amazing Spider-man nail art (& DVD giveaway!)

Let's talk Spiderman! 

I knew I was going to like the newest Spiderman film as I'm such a big fan of Emma Stone (I love her!) and Andrew Garfield (er, hello) but I didn't realise just how much I would love it. There's a scene where he swings through the streets of New York & I genuinely got a bit of a lump in my throat. Aw. 

So I was pretty chuffed when Sony Entertainment got in touch  asked me to put together a spidey nail art look using a couple of polishes from the OPI Spiderman collection to celebrate the release of the Amazing Spider-Man on DVD & Blu-ray. 

OPI - Call me Gwen-ever* | OPI - Into the Night* | OPI - My Boyfriend Scales Walls*
I was sent Call me Gwen-ever (a corally orange), Into the Night (a metallic dark blue), and My  Boyfriend Scales Walls (a white polish with a tinge of grey). I had thought about trying to do a subtle spiderman pattern (maybe a tiny bit more appropriate for the serious work meetings I have this week), then thought nah - I'm going full spidey!


So I painted this mix of webs & the Spiderman mask. It's really easy to do - all you need is a thin brush or nail art pen to paint the lines of the web.

Sony have also kindly offered a couple of copies of the DVD as a giveaway - so if you'd like a chance to win one, just comment with your email address below!

The Amazing Spider-Man is out on Blu-ray & DVD on Monday 26th November (that's today!).

The competition will close on Monday 2nd December & winners will be notified by email. 

Monday, 8 October 2012

Halloween how to: nail art

Next up in my halloween how to series is nail art! Ten spooky designs step by step.


I used a mix of polishes (mainly Models Own) & my nail art pens. Here's how you do it.

Frankenstein

1. Paint your base coat. I used a light turquoise (Peppermint by Rimmel).
2. Add the hair and do a line with dashes (stitches!) across it.
3. Paint two white dots for eyes.
4. Lightly dot two pupils.

Dripping blood

1. Paint your base coat. It's best to use a colour that will let the red stand out clearly.
2. Use white polish to paint a guide for where the red will go.
3. Add red on top. I deliberately made it really gloopy.

Mummy

1. Pick your base colour. I was tempted to use white for this, but thought yellow would look more like decaying bandages.
2. Paint a thick line near the top (this is the gap where the eyes are going), and criss-crossing lines across the rest of the nail to look like bandages.
3. Add two white dots.
4. Dot red on top to make evil eyes!

Teeth

1. Paint a dark base coat. I had a black polishes with a very gentle gold shimmer which worked perfectly.
2. Roughly paint two strips of white - one at the top and one at the bottom of your nail. Then paint teeth, a mix of fangs and smaller teeth.
3. Go over the top and bottom of the nail with red polish.

Candy cane

1. Paint a white base coat (my white polish is on the end of its tether, but it's okay that it isn't too smooth as only a little is showing).
2. Add a yellow layer of polish, about a third of the way up.
3. Add an orange layer over the last third.

Pumpkin

1. Paint an orange base coat. I striped another shade of orange over this for a bit more depth, but it's hard to make out here (maybe it's too subtle!).
2. Paint on a pumpkin face with a black nail art pen.
3. Add a wee zig zag of green at the top of the nail to make the stalk.

Skull

1. Paint a white base coat. Again, I knew I was going to layer this polish so it doesn't matter that it was a little bit bumpy!
2. Lightly sponge on some grey across the nail.
3.  Paint on eyes, a nose and teeth.

Spider web

1. Pick your base colour. It could be anything, I used the same purple that I used for the dripping nail to tie the set together.
2. Paint lines across the nail, coming from one corner.
3. Join them up with little curved lines to make the web.

Cat

1. Pick your base colour. I used the same colour as the frankenstein nail.
2. Paint the shape in small stages - a semi-circle, then triangle ears, then a curved line for the tail.
3. Use a green nail art pen to paint two teardrop shapes. Add a black line to each to make the eyes.

Beetlejuice stripes

1.  The easiest one of the lot! I used the same shimmery black that I did with the teeth nail.
2. Paint on white stripes.

& that's it! If that's too much of a halloween overload for your nails then you could pick one design and use it as an accent nail.

Or if you do like it, but can't be bothered painting them yourself, then you can buy this set from me on etsy! I've been thinking about setting up an etsy shop for a while.. so this is a wee experiment to see if it's of interest. Fingers crossed!

Friday, 5 October 2012

Polka dot nails


Super simple nails, but I wanted to show off my new favourite shade of polish (I'm a big fan of turquoise if you can't tell). This is 17's Supreme Shine polish in Wave, with one coat of glitter (also from 17, pretty sure it was in the little freebie sets they do every now and again) & white polka dots!

I really like 17's nail polishes - they are really affordable, go on smoothly and come in such a nice range of colours. They tend to go gloopy after a while, but I use up polish so quickly that it's not really a problem for me.

My nails are really annoyingly short again - I wish I didn't bite my nails, but I am a bad person and I do. I'm going to have to think up a complicated nail art design that takes me AGES to do to nip this bad habit in the bud.

Tuesday, 18 September 2012

Galaxy nail art

Last weekend I was reading Burkatron, one of my new favourite blogs (if you haven't subscribed yet, do it!), & I spotted her tutorial for galaxy nail art. It had been absolutely ages since I last tried this so I thought I'd give it a go!


It's a really simple tutorial - you just paint your nails a dark base colour (I had no black polish, so I used Crayola's dark blue) and randomly sponge lighter colours all over your nails. I used a mixture of yellow, light blue, purple and turquoise (all Model's Own polishes).

Then you add in random white dots (to make stars), use a little bit of glitter & seal with a top coat.


Some nails are better than others, but overall I'd say it's a huge improvement on my last attempt (look how short my nails are! & how bad my photo is! Sorry older readers..!).

My nails are in a bit of a state at the moment, they are all different lengths and just feeling a bit knackered (if er, nails can be knackered). A proper beauty blogger I am not.

Friday, 7 September 2012

Pastel rainbow nails


I've had quite boring nails for the last few days - I tried a french manicure for the first time in my life... pretty, but not really my cup of tea! So to brighten things up I painted my nails with some of my favourite nail varnish colours:

Models Own lemon meringue, pastel pink, lilac dream, feeling blue & Rimmel peppermint.

Models Own are hands down my favourite brand of polish AND are planning to release a 50% discount code when they reach 100,000 likes on facebook. So if you are reading this & are a nail polish fan please like them, so I can stock up guilt-free!

Thursday, 23 August 2012

Red glittery nails

Barry M - Red Glitter
LOOK AT THIS NAIL POLISH!

It's such a dream. I am an absolute magpie, and am easily drawn by the smallest flicker of potential sparkliness on a nail varnish shelf. It can be disappointing when you get a glitter polish that looks really promising, but actually takes about 10 coats to build up.. not this one though!

It's by Barry M & is the bargain price of £2.99. I used a nail strengthening base coat and a top coat of Seche Vite, and it's lasted with no chips so far!  I'm so pleased... it feels like they've bottled up a pair of ruby slippers. 

Wednesday, 25 July 2012

Ombre leopard print nails

Rimmel - Professional Finish in Peppermint | Models Own - Lilac Dream

I've been meaning to do this nail art for AGES - there was a wee flurry of bloggers doing it a while ago and I have been meaning to jump on the bandwagon.

It's super simple. You just paint the base colour (I used my favourite turquoisey shade) then take a piece of sponge and lightly dab on the second colour (I used purple). The gradient on mine looks a bit rubbish if you look too closely, but I think it does the job well enough!

Dainty Dresses has a good tip on using clear polish to make a softer gradient, so I think I will try that next time!

Thursday, 21 June 2012

Simple aztec nails

Models Own - red alert

I've been going a wee bit over the top with my recent nail art attempts, so it was nice to have simple nails for a change.

I used my favourite Models Own  red - I really love this polish! It goes on really smoothly and is pretty much the perfect shade of red. I then used my (now going slightly gloopy) nail art pens to add the detail on the accent nail.

Sorry for the incredibly dark photo by the way - Scotland seems to have forgotten that it is MEANT TO BE SUMMER. I miss daylight!

Wednesday, 6 June 2012

Disney Pixar's Brave nail art

I'm really excited about this! Brave is the brand new Disney Pixar film that is coming out this summer. It's set in the Highlands of Scotland about a feisty ginger princess who defies her parents, gets mixed up with curses & gets in all sort of bother. There's no doubt a positive, life-affirming message alongside lovely music and visuals. Lovely stuff. 

The European premiere is also the Closing Night Gala of the Edinburgh Film Festival which is also good because I love the EIFF! They always kick off festival summer season perfectly for me, and I love that every year I see films that I wouldn't take a chance on the rest of the year round (they might not always be my cup of tea, but that's all part of the experience).

Anyway. That all in mind, I was keen to give Brave-inspired nail art a go! I really enjoyed doing  Avengers nails earlier in the year, and thought this would hopefully be a little easier as I was essentially "just" recreating a cartoon. Ha.


Horse, Bow & Arrow, Merida, Tartan, a Castle 
I'm not going to lie. It took a while.

Swirl, Tartan, Merida's hair, Queen Elinor, Stone Circle 
But I'm pretty pleased with it! 

Close up on character faces: Horse, Merida, Queen Elinor 

I just used my phone to take screenshots of the trailer and then tried to pick out a few easy images that fit the theme and would fit on my nails! This definitely isn't an everyday manicure, but it was worth it even just to see how much steadier I am painting with my left hand than when I first started this blog!

(I am SUCH a child, I know. Don't judge me!). 

Tuesday, 29 May 2012

Jubilee nails

 The Diamond Jubilee is this weekend, marking the 60th anniversary of the Queen's reign (go on yourself, Lizzie!). There's loads and loads and loads of Jubilee themed merchandise and things cropping up on the internet, but I thought there was one thing missing in quite a few of them... CORGIS

So here's my take on a Jubilee manicure - flags, crowns, corgis and all! 

Corgi, polka dots, flag, corgi with crown (!), polka dots

This was actually one of the most fun nail art projects I've done in a while! It took quite a while to do the different layers on the corgi nails (brown circle for face, add white stripe and white triangles for ears, outline ears, add nose and eyes!), but I was catching up on gossip girl which made it much easier to be patient and let things dry!

Polka dots, crown, flag, polka dots, corgi!

If you fancy trying this yourself I'd highly recommend getting some nail art pens (as they make everything easier) - failing that get some fine brushes which should do the trick.

Also, if you are going to a tea party this weekend - I am jealous of you! Tea parties are the best (I will be in Paris though.. so I am not that jealous of you).

Wednesday, 23 May 2012

Bunting nail art

Rimmel - Professional Finish in Peppermint | Nail art pens


I saw this idea on a tumblr post a few months ago and have been waiting on a nice summery day to try it out for myself. Luckily the sun has decided to FINALLY come out in Edinburgh, so this week seemed like a nice excuse for it.

I used my new trusty nail art pens to make little triangles, and then outlined them with a white nail art pen. Some nails are considerably neater than others, but I am quite chuffed with my wee bunting flags!

I am also really loving this peppermint nail polish, and have been wearing it pretty much constantly since I bought it (as you can see here, here & here!). It's one of the Rimmel Pro shades, and it is just such a beautiful shade that goes on very smoothly.

Tuesday, 8 May 2012

Nail art pens

A couple of weeks ago I ordered a set of super cheap nail art pens from Amazon. I hadn't heard of the brand before, but for under £9 I thought it wouldn't break the bank too much if they were rubbish.


You get 24 colours in a pack (I think the colour range might change a little bit with each order, but you get a mix of reds, yellows, blues, greens and metallics). Each pen has a thin brush and a pen nib so you can use them in different ways depending on what you are painting.


I really really love them! As you can probably imagine (because of the price) the pens are pretty cheaply made. The quality of each polish isn't great either - it's pretty gloopy and also comes out of the pen nib really quickly. But I don't think that really matters much with nail art as you'll be using these pens for detailing, not for painting the main coat of varnish.

I used these pens to do my Avengers nails and for these nautical nails, so you can see how well they work.

If you fancy them you can buy them from Amazon here. Shipping is a couple of pounds, but I still think it's great value for money considering how many colours you get!