Showing posts with label baking. Show all posts

Monday, 22 February 2021

HOW TO: BAKE A JAPANESE STRAWBERRY SHORTCAKE

I am a pretty lazy baker these days, but I had to share this recipe for my new favourite cake! This is a beautifully light and soft sponge (which was decorated for my SnowRunner-loving boyfriend, construction vehicle decoration is optional!). I actually doubled the recipe below to make a mega cake, so scale up if you want a cake with height!

Heads up - this recipe involves leaving the cake to rest overnight before decorating/eating, so if you are looking for a cake to bake today, you will have to skip this step. 


You will need:

Cake 
  • 3 large eggs
  • 115g caster sugar
  • 100g plain flour
  • 40ml milk
  • 25g unsalted butter
Syrup
  • 60ml water
  • 30g sugar

Icing
  • 300ml fresh whipping cream
  • 20g sugar


Start by preheating your oven to 170°C and grease and line a 7 inch cake tin.

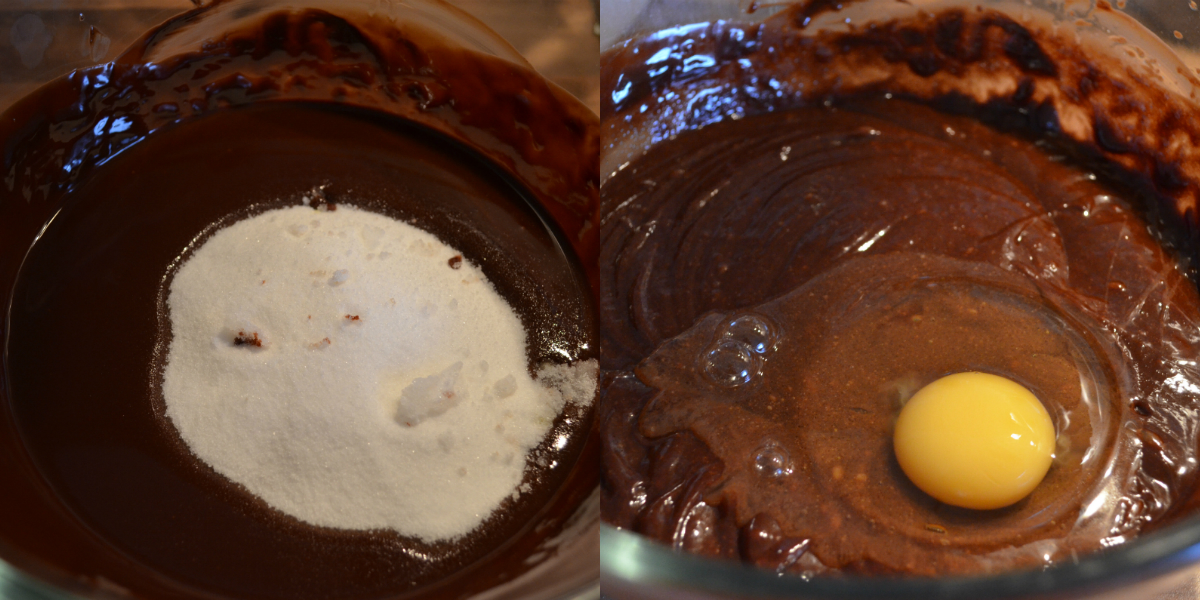
Separate the egg yolk and egg whites (it's actually easiest to do this with your hands!).  Place the egg whites in a large clean bowl and then, using an electric mixer on medium speed, gradually add the sugar into the bowl. Beat the egg whites and sugar together until stiff peaks form.

Still using the mixer, add the egg yolks into the egg white and sugar mixture. 

Then, using a big spatula, gently fold the sifted flour through this mixture until it is all mixed in. Be careful not to over-mix at this point, you want to keep all of that lovely air in the batter! 

Take a small bowl, and mix the milk and melted butter together. Now, take a small amount of the egg white mixture and stir it into the milk and melted butter. Mixing a bit of the batter with milk and butter stops the dairy from deflating the batter - the mission is to keep your sponge as airy as possible! Then add the milk/butter/batter to the rest of the egg white mixture and stir until its all mixed in.

Pour the cake batter into your cake tin, and bake for 35-40 minutes (you'll know it's ready when a skewer or sharp knife comes out of the cake clean). Resist the urge to open your oven when it is baking!

Once the cake's done, drop the cake tin onto your kitchen counter (this breaks the steam bubbles inside the cake and means your cooled cake will have a better structure). Leave to cool in the tin for 5 minutes, then turn onto a wire rack and leave to cool completely. When it's cool, wrap in clingfilm and leave at room temperature overnight - this makes for a tastier cake!

The next day,  slice the cake in half (I chose to double the recipe and used two separate cake pans so I skipped this step). Mix the water and sugar to make a syrup, and brush this onto the two cut sides of sponge. 

Whip the cream and sugar until it's nice and fluffy, then decorate your cake. In the middle I layered cream, then sliced strawberries, then more cream, and I piped cream on top. Enjoy!

Tuesday, 23 October 2018

HALLOWEEN BAKING IDEAS

I'm a pretty lazy baker these days (my previous applying-for-Bake-Off-self wouldn't be proud), but if there's anything that's going to motivate me, it's Halloween inspired baking. I just love themed things!

I've been busy on pinterest, picking out the creepiest cakes and the most devilish of desserts, which would all be a delight, whether you are throwing a party, hanging out with pals, or just want to creep out your colleagues.

I'm particularly in love with the brushstroke ghost cake (so cute! so on-trend!), the blood-splattered cookies are simple, but very effective, and I have a sweet spot for gory things, so the gruesome anatomical heart cake is definitely a showstopper (ahem, and I'm possibly biased because I baked that myself). Whatever you choose to do, have a delicious Halloween!


Top row

Middle row

Bottom row

Monday, 29 January 2018

HOW TO: COOKIES OF CATAN

It's been an age since I last shared a baking post on here, so I wanted to share my absolute favourite thing that I baked last year... an entirely edible (and playable) Settlers of Catan cookie board. Cookies of Catan!

Cookies of Catan edible Settlers of Catan playing board

If you've never heard of Settlers of Catan, where have you been? It's a seriously-addictive German strategy board game. You play as a settler on the island of Catan, building houses and roads while trading and getting resources from the land you've built. It's really competitive, and you have to try and outwit your pals, whilst also keeping them on your side so you can trade with them. Does that sound mega complicated? I promise it's really fun!

My friend said she wanted to have a chilled birthday, staying in and playing Catan, so Josh and I decided to do one better and surprise her with a totally edible board. It took us HOURS to make, but it was so satisfying, the surprise totally worked,

Cookies of Catan edible Settlers of Catan playing board

I used a simple sugar cookie recipe to make the biscuits, as we needed something that would keep its shape pretty well, and would be sturdy enough to hold all the decorations. We actually made half the batch using a chocolate sugar cookie recipe (this one, I believe), but Nigella's was far better - if you're going to do this, I'd keep it simple!

The Catan board is made up of hexagonal tiles. I used a 3D printed cookie cutter (the benefits of being pals with Edinburgh International Science Festival!), but you can buy hexagon cutters online easily enough.

We cut the dough into hexagons and went over each cookie with the cutter again, once it was out the oven and had cooled slightly, just to make sure the lines were sharp and the cookies were the same size - the board had to slot together, so it was important to try and be as precise as possible!

Cookies of Catan edible Settlers of Catan playing board how to

The board is made up of six different types of tile: wheat, sheep, wood, red brick, stone ore and the sea (with one extra desert tile where the robber lives). For each type of tile we made a fondant base: light green for the sheep, dark green for the forest,  yellow for the wheat, a red brick pattern for the brick, and swirly grey for the stone ore and swirly blue for the sea. This obviously took AGES, but was well worth it, and much better than just using icing - I think it's so much cleaner looking and it's obvious what each tile is meant to be!

The fun bit was making decorations for each tile. We made tiny sheep out of marshmallows with fondant heads, tiny fondant trees (with little red icing dots for apples), and little fondant stones with silver decorative balls.

Each tile had to have a number - these match the dice you roll during the game, so these were made out of fondant using an edible ink pen.

Cookies of Catan edible Settlers of Catan playing board

It took an entire day to bake and assemble, but it was so much fun, and it totally worked as a playable board (it's a little rough around the edges, but shhh, it doesn't matter). Definitely worth trying if you also happen to share a love of intense board games, biscuits, and fiddly decorating!

Monday, 16 November 2015

HOW TO:
BAKE A GIN & TONIC CAKE

A few weeks ago, my lovely friend Lucy had a gin-themed birthday party. Joshua & I turned the flat into a gin lounge with personalised cocktail menus, a very well-stocked bar, and candles everywhere, and I made a very boozy, very lovely gin and tonic birthday cake.

I've wanted to make a gin and tonic cake for AGES, after spotting this cupcake recipe on Katie Cakes, so I tweaked the recipe a little (and added considerably more gin!). It turned into a light, fluffy and zesty cake that was perfect for the party.


You will need...

Cake:
  • 175g unsalted butter
  • 175g caster sugar
  • 175g self-raising flour
  • 3 medium eggs
  • 1 teaspoon baking powder
  • 1 teaspoon vanilla
  • 3 tablespoons of tonic water
  • 2 tablespoons of gin (I used a 50ml miniature of Edinburgh Gin)

Start by preheating your oven to 170 degrees C, and line your cake tins - I used two 9 inch tins with parchment paper, greased with butter (there is nothing more annoying than trying to get a cake out of a pan, so I always over-grease!).

Beat the sugar and butter in a bowl until it's light and creamy. Then add the eggs, mixing them in one at a time. Add in the flour and baking powder, stir it into the mixture, and then mix in the tonic water and vanilla essence. Add the mixture to your cake tins, put them in the oven and then LEAVE THE OVEN ALONE for at least 30 minutes. My cakes took about 45 minutes to bake, but I was using a slightly old oven, so yours might be quicker - just remember that if you open the oven door too early, you'll risk flattening your poor rising cake. It's better to leave it for slightly too long, than have it collapse on you!

Once the cake is golden, and a skewer comes out clean, remove from the tins and place on a cooling rack. While tit's still hot, pierce all over the sponge with a skewer, and brush gin all over the cake.

Icing & filling:
  • 500g icing sugar
  • 250g butter 
  • 100g lemon curd
  • The rest of your little bottle of gin
  • Zest of 1 lime

For the icing, mix icing sugar and butter until it's smooth and fluffy. Add in four tablespoons of gin and a squeeze of lime and whisk again. For the filling, mix lemon curd with the whatever gin you have left.

Then put your two sponges together with a layer of icing and lemon curd between them, add icing on top, and decorate with lime zest, lemon peel, and a few copper sprinkles. Enjoy!

Tuesday, 17 February 2015

PANCAKE DAY RECIPES

It's pancake day! The most wonderful day of the year!

I know I could actually eat pancakes whenever I want, because I am a grown up and they are so simple to make, but it's special on pancake day - the world gives you an excuse to have sugar and whipped cream for dinner, and to feel good about it.

My favourite pancakes are super thin crepes (this recipe) drizzled in lemon and sugar, but I'm also partial to an over-the-top ridiculous american-style pancake. This year I think I'm actually going to use the excuse of lent (despite not being religious at all) to give up refined sugar and fried foods until Easter... I want to shake off my sluggish winter feelings!

So, as this is my last chance to be super indulgent for a while, I'm really looking forward to tonight's tea. Here's a few pancake recipes from Pinterest that look seriously good!


Top row

Bottom row

Sunday, 26 October 2014

HALLOWEEN HOW TO:
Bake a spiderweb chocolate cake

I love an excuse to bake, so I was pretty pleased when Waitrose got in touch to tell me about their ultimate chocolate cake recipes, challenging me to pick one, and incorporate a secret ingredient into the recipe somehow. Obviously, being the Halloween-obsessive I am, I picked their ultimate halloween cake - a red velvet sponge, with a spiderweb finish. Yum!

Here's how you do it...


You'll need the following:

For the cake -
  • 200g salted butter
  • 350g plain flour
  • 1 tsp baking powder
  • 1 tsp bicarbonate of soda
  • 2 1/2 tbsp cocoa powder
  • 1/4 tsp fine sea salt
  • 375g caster sugar
  • 3 eggs
  • 1 1/2 tsp vanilla extract
  • 284ml carton of buttermilk
  • 1 tbsp white wine vinegar
  • 2 x 10g packs of Dr Oetker red gel food colouring
For the filling - 
  • 120g salted butter
  • 120g philadelphia
  • 120g icing sugar
For the icing - 
  • 300ml double cream
  • 250g dark chocolate (70% cocoa)
  • 1 1/2 tbsp liquid glucose
  • 50g white chocolate


Start by heating your oven to 170 degrees, and get your cake tins. The recipe recommends using a 23cm cake tin - I didn't have one this big, so I improvised with two slightly smaller ones instead. Grease these and line with baking parchment.

Mix together all of the dry ingredients except the sugar, and set aside. 

Beat together the butter and sugar until smooth, then add the eggs, one at a time, beating after each addition. Add in the vanilla, and stir again.

Now, beat in a quarter of the dry ingredients, then a third of the buttermilk, and repeat until it's fully combined. When you are mixing each time, don't do it for too long - you don't want to mix all of the air out of the cake batter! Just do it until there's no lumps.


Mix the vinegar and red food colouring together to make a gloopy paste, and mix this into your cake batter. Add the batter into your cake tin (or tins!) and make sure it's nice and level.

Put it in the oven and LEAVE IT ALONE. Cakes have a bad time if they are exposed to cool air when they are baking, so keep your oven door shut for as long as possible. It took my cake about 50 minutes to cook - if you are baking it in one big tin it might take longer. Just leave it until the sponge bounces back when lightly pressed, and when a knife comes out of the sponge clean.

When it's ready, get it out of its tin and leave on a wire rack to cool.


Once it's cool you can make the filling by mixing the butter, philadelphia and icing sugar until it's nice and smooth. 

The original recipe suggested making the cake in one big tin and cutting into three layers. I obviously didn't do that, which means my cake has the BIGGEST FILLING EVER. Just look at it (I'm pretty okay with this, to be honest). Leave to set (Waitrose suggest putting it in the fridge for 20 minutes, I have always preached against cakes in fridges. Do what makes you happy!).


Time to make the most glorious chocolate icing! Melt the chocolate, cream and liquid glucose but putting them in a glass bowl over a pan of simmering water (making sure the base of the bowl doesn't touch the water). Stir gently until it's all melted.

Then, put the cake on a wire rack (over a tray to catch the drips), pour the chocolate icing over the middle of the cake, and smooth out the icing across the top and down the sides. I realised at this point that because my cake is a monster (with uneven sides), I was not going to achieve the perfect even coating of my icing dreams. It's okay. I'm embracing my muckle cake. 


Melt the white chocolate (you can do this in a bowl over a pan again, but I just used a microwave), pour into a sandwich bag and snip the corner off to make a piping bag! Pipe circles on the cake.

Then take a cocktail stick and, starting from the centre, pull it through the white chocolate to the edge of the cake. I've seen this cobweb effect done before and felt a bit nervous about trying it, but it's exactly as easy as everyone says. SO easy. 


Then it was time to incorporate my secret ingredient from Waitrose - which turned out to be gold leaf. I excitedly imagined making loads of little gold spiders to creep across my cake... and then I attempted to use gold leaf and realised it is SO TRICKY and fiddly. SO TRICKY. SO SO SO TRICKY. It crumbles at the slightest touch, and it sticks to everything, and oh my goodness.

However, I managed to very carefully cut out a shape and get it onto the cake. It's not the most artistic spider (or even, spider-like spider), but I'm really pleased with it!


And here's the world's most decadent halloween chocolate cake in all of its glory! YUM.

Disclaimer: Waitrose supplied me with a giftcard to buy ingredients and some nice baking things to use in this challenge. Thanks guys! 

Friday, 26 September 2014

HOW TO:
Bake a chocolate nut roll

I am a big fan of baking, but I seem to be totally behind the times when it comes to fun-things-that-everyone-likes, so I've only just started watching the Great British Bake Off (and Doctor Who, and everything else that everyone likes. I'm late to the party).

Luckily, I get the GBBO hype now, so I was pretty excited when Stork challenged me to this week's technical challenge as part of their #storktwist Great British Bake-Off Blogger Challenge (phew!). Here's how I did it...


You'll need the following ingredients:

  • 525g plain flour
  • 1 & 1/2 tsp salt
  • 65g caster sugar
  • 2 tsp yeast
  • 240ml soured cream
  • 2 large eggs
  • 40g Stork
For the filling:
  • 115g Stork
  • 120ml evaporated milk
  • 200g caster sugar
  • 85g cocoa powder
  • 450g mixed nuts (I used 150g walnuts, 100g pecans, 100g hazelnuts, 100g almonds)
  • 100g dark chocolate chips
  • Milk to glaze
And you'll want to heat your oven to 160 degrees (or 180 degrees if it's not a fan oven). 


To start, grind your nuts in a food processor. In GBBO they gave one of the contestants good comments for not grinding his nuts too finely, so only give them a quick blitz. Warm the Stork, evaporated milk and caster sugar in a small pan, stirring constantly, until it is melted and combined.


Stir in the ground nuts and cocoa powder, heating gently until the mixture thickens (mine got quick pretty quickly). Remove from the heat and transfer to a bowl to cool to room temperature.

Now, start to make your dough (OH GOD). Combine the flour, sugar, yeast, salt, soured cream, eggs and Stork in a bowl. Do not do what I did, which is carefully measure out a teaspoon of salt... get impatient at how slow the salt is pouring... give it a shake, and knock the top off - causing the ENTIRE tub of salt to tumble into the dough, forcing you to restart the whole bloody thing. Don't do that.


Mix to a rough dough. I find it quite hard to knead dough in a bowl, so I tipped it out onto a lightly floured surface. Knead for ten minutes, by pinching the dough with your fingertips, lifting and pressing back down. I'd recommend setting a timer for this bit - kneading isn't the most exciting thing in the world, so it's easy to feel like you've been doing it for AGES (when it's actually only been four minutes).

Transfer to a lightly greased bowl, cover and allow to rise for an hour. Do your washing up.


Now, the fun bit! Lightly grease the worksurface and split the dough in half. Roll out each portion to a rectangle (they recommend 25cm x 40cm, but I just guessed).

Spread half with the chocolate nut filling - this isn't the easiest thing to spread, but just take your time and you'll be fine. Sprinkle over half of the chocolate chips.


Fold over the two short edges just a little to encase the filling. Take the long edge, and start to roll the dough tightly to make a long roll. If you've greased your worksurface, it should be easy enough to roll without the dough tearing. Make your second roll the same way.

Transfer both rolls to a lined baking tray, cover loosely and leave to rise for THREE hours. Yup. Three. Hours. This is very, very much a bake for a lazy Sunday afternoon (rather than a Wednesday evening). Do your dishes while you are waiting.


When they are all nicely risen, brush with milk and bake in the oven for 35 minutes until golden.

Enjoy with a cup of tea!

Wednesday, 29 January 2014

How to: bake a chocolate (rat king!) cake

Sometimes inspiration comes from the weirdest of places...

A few weeks ago Joshua was explaining to me what a rat king was (which, if you don't want to see grizzly photos, is basically a group of rats that get their tails twisted together, forming a living bundle of rats). Wikipedia helpfully tells us that a rat king was often seen as a bad omen... which, well. OF COURSE A BUNDLE OF RATS is a bad omen. Jeeeeeeeez.

Anyway, this conversation then obviously turned into how you would best recreate this in confectionery form, and the Rat King Challenge (aka Joshua's weird birthday cake) began!


I used my favourite chocolate cake recipe, with millions of sweets to decorate. It's really rich, but not too dense, I'd recommend trying it!

You will need:

  • 200g dark chocolate
  • 170g butter
  • 350g light brown sugar
  • 3 large eggs
  • 370g plain flour
  • 1 1/2 tsp baking powder
  • 1 1/2 tsp bicarbonate of soda
  • 1/2 teaspoon salt
  • 500ml semi-skimmed milk
  • 2 tsp vanilla extract
  • Loads of bowls


Start by heating your oven to 170C, and grease and line two 20cm cake tins. I have greaseproof paper circles from Lakeland and they are so useful - no more faffing around cutting paper to fit!

Break the chocolate into pieces and melt either in the microwave (be careful that it doesn't burn!) or in a glass bowl over a saucepan.

In a big mixing bowl, cream the butter and sugar until it is pale and smooth. Then separate your eggs, and beat the egg yolks. Add the yolks to the butter and sugar mixture, mix, then add the melted chocolate and mix again.


In another bowl, mix together the flour, baking powder, bicarbonate of soda and salt. Combine the milk and vanilla in a jug, and then alternate between adding milk or flour to the chocolate-sugar-butter mixture and stirring, until all of the flour and milk has been added.

In a clean bowl (which must be spotless, because egg white is really annoying), whisk the egg white until it forms soft peaks. Fold them into the cake mix using a bowl, and gently mix together (you want to keep as much air as possible in the batter, so no enthusiastic mixing!).

Divide the mixture between both cake tins and bake for 30 minutes. You'll know it's ready when you put a sharp knife in the middle and it comes out clean.


Now for the ridiculous bit. As it's a bit of a disgusting subject matter, I wanted to make the cake as cute and pastelly as possible... while still tying in lots of rat king details.

So I used sugar mice and knotted their tails together, then made tiny little fondant crowns (which were dipped in edible glitter - SO fiddly to do!). I iced the cake in goopy green icing to try and make it look like a slimy sewer (an effect probably lost by edging the "slime" with silver dragees and chocolate buttons). And I also made a nest with chocolate matchmakers, chocolate curls, and shards of sugar (melted down sweets that looked like scary stabby glass). PHEW.


And here it is! Definitely the most ridiculous cake I've ever made, but so much fun to do!

Monday, 14 October 2013

HALLOWEEN HOW TO:
ANATOMICAL HEART CAKE

This week's halloween tutorial is totally inspired by (aka my very best attempt at recreating) this amazing bleeding heart cake by London bakers, Lily Vanilli. They posted a guide on how to make these cakes on their blog (which you can see here!), but I thought it would be helpful to make my own version with step-by-step photos.


To make your own gory hearts, you need the following:
  • cupcakes (I used this recipe, which is super easy & always works well!)
  • red food colouring
  • red fondant 
  • buttercream (use 200g butter, 200 icing sugar)
  • cherry jam
  • a paintbrush


Once you've made your cupcake batter (you can see step by step cupcake instructions here), add a couple of drops of food colouring (I used red.. which came out really weirdly orange, but it works for halloween!), and stir into the mixture. 

Spoon into cupcake cases, and then use either a bit of tinfoil or baking paper to stick between the case and the tin. This means your cake will bake in more of a wedge shape, which is helpful for these hearts! Bake for 15-20 minutes, then when they are ready, put them on a cooling rack and leave them alone for half an hour.


Roll out a lump of red fondant (remember and dust the surface/rolling pin with icing sugar beforehand so it doesn't stick!) until it looks big enough to cover a cupcake. Take the cake out of its wrapper, splodge a little buttercream on the bottom and place in the middle of the fondant. 


Now, this does look tricky (and a bit rubbish) but remember, there is light at the end of the cake tunnel! Start wrapping the fondant up and over the cake, squeezing the edges together when they reach the top. You want to create three funnels (meant to be the arteries) so don't join it all perfectly, instead let it fold in on itself (like in the left and middle photos). 

Don't worry about any folds or creases in the sides of the icing, they'll make the heart look much more realistic. Just use your fingers to shape the top of the heart, give more definition to the arteries, and make sure the fondant feels nice and secure around the cake.


 If it looks a bit rubbish, do not worry! Food colouring will fix everything. I mixed red food colouring with a spot of cherry jam to make a gloopy paste, which I painted onto the cake. Make sure you get it into all of the cracks and creases - and look how much it transforms the cake!

Smear a bit of the cake blood around the bottom of the heart. Mmmm, gore!


Serve with an evil laugh. Enjoy! 

Monday, 9 September 2013

How to: bake chocolate chip cookies

Autumn is here, days are getting darker, and nights are getting colder. That means it's pretty much perfect time for baking, and a good cookie recipe is something you should have to hand at all times!


Here's what you need:
  • 150g butter
  • 80g light muscovado sugar
  • 80g granulated sugar
  • 1 large egg
  • 225g plain flour
  • 1/2 teaspoon bicarbonate of soda
  • 1/4 teaspoon salt
  • 2 teaspoons vanilla extract
  • 200g plain chocolate chips
  • 75g white chocolate chunks

Start by heating your oven to 175 degrees, and look out some baking trays and baking paper.


Ideally, you should have left your butter out for a while to soften up before baking. I forgot to do this (I'm a rubbish baker sometimes), so instead I grated it into a bowl. This looks super weird, I know (it looks like cheese!), but it makes it a million times easier to mix it, and avoids the danger of any horrible buttery lumps!

Mix together the butter, muscovado sugar and granulated sugar until it's soft and creamy. Add the egg and vanilla extract, mix again until it's nice and smooth, then add the flour, bicarb of soda and salt. Mix again (I couldn't be bother getting my mixer out, so just used a wooden spoon for the whole thing) until everything's combined.


Now add your toppings! I went a bit chocolate mad with plain chocolate chips and white chocolate chunks (mmm) but you obviously can add anything - raisins, hazelnuts, marshmallows - go wild. Mix it all together so the chocolate is evenly distributed and spoon small dollops of the dough onto your baking tray. Try and spread them out and don't feel like you need to cram loads on the tray - you'll just end up with one MASSIVE cookie if you do this (although that's not necessarily a bad thing!).


Bake in the oven for about 10 minutes, until the edges of each cookie go light brown. They'll be stupidly soft when you first take them out of the oven - that's okay, as they'll harden up as they cool. Just slide them onto a cooling rack (I didn't even bother trying to take them off the paper until they'd cooled down) and leave for a while.

This recipe made about 24 cookies (I only had one baking tray, so it took me three goes to get them all in the oven). They're all a bit mismatched and odd sizes, but who cares about that? They are gooey, chewy, soft cookies and they are delicious.


Yum!

Monday, 27 May 2013

How to: make chocolate, mint & avocado mousse

I like it when an intriguing email finds its way into my inbox.. and the AERO perfect pairing challenge was definitely that! To celebrate the relaunch of AERO Bubbles, I was challenged to think up my own perfect flavour pairing - the weirder the better.

Here's how I got on...


I'm going to admit, I was so quick to say - yes! chocolate! weird things! fun!- that it didn't actually dawn on me that I'd have to try and come up with something strange and, more importantly, eat that strange thing until a big box arrived at my door. 

Luckily, AERO sent out a heap of fun cooking things (thanks guys!) and a very beautiful copy of The Flavour Thesaurus to inspire me.


This is really the most BEAUTIFUL book, if you are into flavours or food at all I highly recommend it! It barely took any time at all before I saw the words "chocolate" (hello) and "avocado" (also, hello), and put strange thoughts such as beef-raspberry-coffee out of my head. 

I wanted to make something that I actually might want to eat, and that would fit on this blog... and a gooey, chocolately mousse sounded perfect.

Here's what I used:
  • one large avocado
  • 30g dark cocoa powder 
  • 2 tbsps honey
  • 2 tbsps fresh mint
  • 4 tbsps milk
  • 1 egg white, whipped
  • 1 aero bar, grated


I like to be lazy when I can get away with it, and this is ridiculously easy. You just stick the avocado, cocoa, honey, mint and milk in a bowl, and give it a big whisk, making sure all of the lumps have disappeared! Then whisk your egg white, feel bad about not knowing what to do with the egg yolk, and gently fold the egg white into the mixture. This makes it light and fluffy and mousse-like!


Then spoon it into serving dishes of choice (I used tea cups and this recipe made two MASSIVE portions), grate some chocolate around the edge and leave it to sit in the fridge for an hour or two. When serving, add a few fresh mint leaves & you are good to go!

I was a bit nervous about how this would taste, but I was actually really pleasantly surprised! The avocado adds a lovely smooth texture to it, but the taste is alllll chocolate & mint (mine was perhaps a tad too minty, but I got carried away as I'd been growing it in my garden!). If I made it again I'd probably melt some dark chocolate too and add that to the mix, just to make it a wee bit more indulgent. Yum!

Disclaimer: AERO sent me a Perfect Pairing Cookery Kit to take part in this challenge.

Monday, 25 March 2013

How to: bake chili chocolate brownies

I've had brownies on the brain since making my rolo chocolate brownie cake last month... they are just so quick and easy to do!


So here's a recipe for brownies with a bit of a kick! You'll need the following ingredients:

  • 75g plain flour
  • 150g unsalted butter
  • 175g caster sugar
  • 3 large eggs
  • 150g plain chocolate
  • 100g chili chocolate
  • half a red chili
  • 75g chopped almonds

Start by preheating your oven to 150 degrees (C), and grease and line a square cake tin to cook your brownies in.


Put a big glass bowl over a pan of simmering water (make sure the bottom of the bowl doesn't touch the water!), and put in all of the chili chocolate, the butter and 100g of the plain chocolate. Stir gently until it's all melted together and is lovely and gooey. Put the bowl aside and let it cool for a moment.


Add the sugar and stir into the chocolate using a mixer (or by stirring really fast with a spoon!). The add the eggs, one at a time, making sure the mixture is nice and smooth.


Add the flour, mix in and then chop up your almonds, chili & leftover plain chocolate. Add this all into the mix, then put it in the oven for 25 - 30 minutes. Brownies should be slightly gooey on the inside, so use a knife to test when it's cooked through, but don't be as strict as you would with a cake!

The result should be lovely chocolately gooey brownies, with a subtle bit of spiciness. Enjoy! 

Tuesday, 29 January 2013

How to: make a rolo chocolate brownie cake

Let's talk Valentine's Day. I fall very firmly into the do-something-nice or make-something-yourself camp of Valentine's day presents - it's a day for celebrating love, not celebrating presents after all!

So I reckon it's the perfect excuse to bake something nice. Here's the key to any chocolate lover's heart - how to make a ridiculously decadent rolo chocolate brownie cake! The valentines day recipe is from Baking Mad.


You'll need the following ingredients:

  • 125g self raising flour
  • 60g cocoa powder
  • 185g butter
  • 225g dark muscovado sugar
  • 3 large eggs
  • 100ml milk
  • 3 packets of rolos (roughly 150g)
  • 50g dark chocolate chips
  • 50g white chocolate chips

& to start, heat your oven to 180 degrees (C). 


As this is a valentine's treat, I made the cake in a heart shaped pan (mine is from Ikea, but there's loads on amazon too). Grease the pan with butter (this means it'll come out smoothly and not stick to the sides).

Measure out the flour, cocoa powder & butter into a bowl and mix together until it forms a bread crumb consistency (I used a food processor, but you can mix it together with your fingers). Then stir in the sugar (mine looked a bit clumpy at this point, but that's okay!).

In another bowl beat the eggs and milk together, then add this into the dry mixture. Stir all together until you have a smoothish batter).


Pour the brownie mixture into the tin, smooth it over so it's pretty even (try not to splatter it everywhere like I did!) and add the rolos on top. Bake for 30 minutes (keep the oven closed while it's baking), then check to see if it's firm in the centre. If it's not, pop it back in for another ten minutes and check again.


When it's out, leave it to cool for a while, so you can take it out of the cake pan without burning yourself / the cake falling apart!

Then melt your chocolate chips (either in the microwave or in a glass bowl over a pan of simmering water) and drizzle this across the cake.


I went a bit mental when drizzling - a less is more approach may have been a bit classier! But I challenge you to try and control yourself with gooey chocolate - it's so much fun!


I surprised Craig with this (his eyes lit up when he saw it), and we both were so pleased with how good it was! The sponge is super moist & chocolatey, the little caramel splodges of melted rolo are brilliant & it's just so good! Yum. There's also more valentines day baking recipes here if you fancy giving it a go.